


Hey everyone, with the new colors being discovered recently, I decided to package them all up into an aseprite palette file/extension. Hope they are useful to someone!
pico8.zip modifies the default pico8 extension that comes with aseprite. Replace the contents of the directory with the contents of the zip. You can find the directory by opening aseprite, opening the list of palletes, selecting pico8, and clicking "open folder".
pico-8-secret.aseprite is just the standalone version which you can load by selecting the "load palette" option.
 1 comment
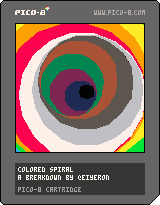
Hello there, after a positng a sketch variation I did on Twitter earlier today, I was asked how one would do such a similar result.
So instead of a badly written Twitter thread, let me post you a badly written BBS post with a badly written (but well commented) breakdown on how I did it.
The spiral is a cylinder sliced in a few circles I offset on X and Y based on a formula. This formula varies with time and on which circle it'll yield the offset to (here, the index).
So, I progressively iterated from nothing to the spiral. Here's how I broke it down:
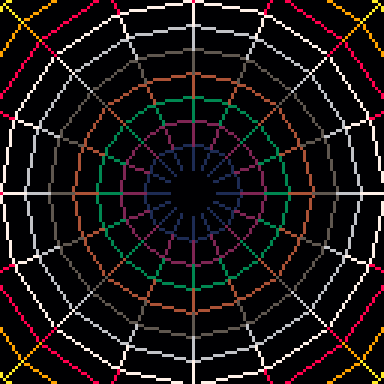
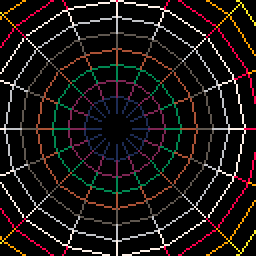
First I generate circles made by vertices I'd store aside. Drawing circles this way will allow me to the other steps. Each circle is drawn by drawing a segment between two consecutive vertices in the circle and by linking the same vertex between two consecutives circles. Here, it looks like a colored spider web.
Then, I made the circles' center move based on the time. But it still doesn't look like a spiral. We can do better.
So I make each circle's offset move indenpendtanly. I draw the circle in a for i=1,n
loop, so I can use i to have a different result per circle. Here I just add an offset to the sin formula to make each center different from the others.
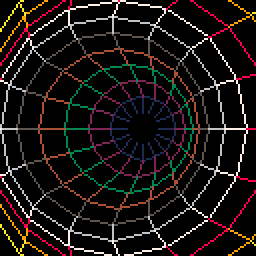
By doing the same on the y axis, I'd have a diagonal if I would use the exact same formula. The complement formula to draw a circle based on T with sine is cosine, so for the y offset I used the same formula but with sin turned into cos. Now each center moves into a circle.
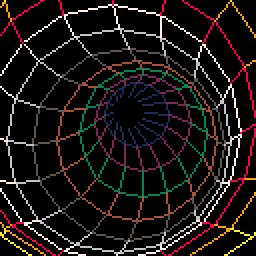
I can perfectly tweak both formulas differently. For instance here, I removed the x offset and made the y offset in a way so circles will cross some of their neigbors. It'll be useful to give a better sense of depth in the next step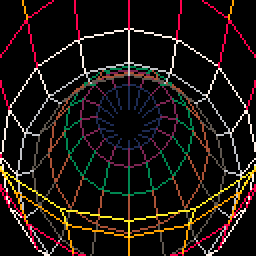
And, as a last step, I replaced the line drawing by drawing quads with the trifill routine generously made by ElectricGryphon so we have a solid tunnel instead of a wireframe one!
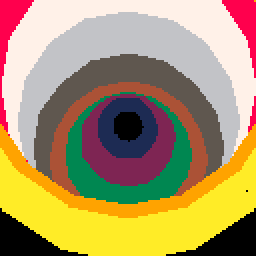
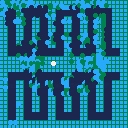
And that's the core basics on how I made the Nuclear Throne inspired vortex sketch a while ago! I'll be leaving the commented code on the bottom of this post, feel free to have a look on how I did it, but here's a fair warning: I clearly didn't optimize the code, there is still a lot that could be done to avoid useless calculations, but it should be clear enough to allow quickly anyone to hack it, it works and in 30 FPS. Have a nice day and happy 32 colors day!


Hey folks,
Been toying around slightly with Pico-8 as a break from bigger projects, and I'm wondering if there will ever be an increase to the possible resolution of pico-8?
I dig the limits being used to force creativity, though I do feel 128x128p only gets you so far and no amount of memory-banking between carts can get around that for game-scale, it was the same thing I took issue with on both Gamebuino consoles.
To note I'm not saying like "hey we should have mega-complex 240p with 3x more sprites and 90 more colours so we're basically just on a snes", but I do think even just an upscale to 160x144 would help so much. I'd looked at alternatives but clearly the community and scale of potential support and resources is here in pico-8. As much as I'd like something like the C64 res of 320x200, I think even just the Gameboy 160x144 on some kind of Pico-8+ with the necessary memory increase, maybe a tiny bit more for graphical allocation, would be great.

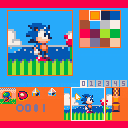
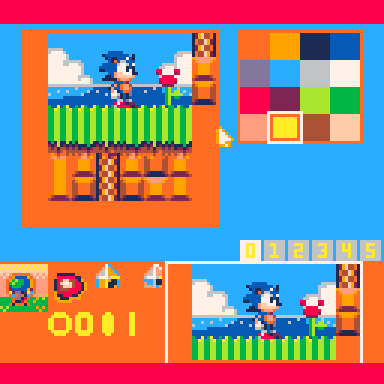
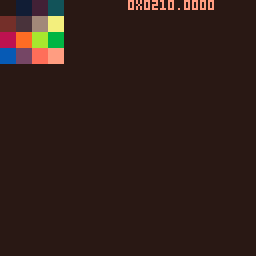
While playing around with poke/peek, I discovered theres a new palette to choose from.
Poking the address 0x5f11 and setting it to a value of 0xf1 [the 1 being the color in the palette, in this case dark blue] you'll notice something strange. The blue seems to be even darker! this goes from 0xf0 to 0xff and corresponds to the color palette available naturally. It seems to darken/add a warm filter to the colors, allowing us to provide sprites with more specific details. You can see this in action via Neil Popham's post on twitter. To return the color to normal, replace the f before the color ID with 0. for example, 0x01 would be normal dark blue where as 0xf1 is the darker dark blue.
https://twitter.com/ntpopham/status/1169166881607077888
Address range is 0x5f10 to 0x5f1f from what I can tell, and there is no other hidden colors yet discovered but knowing zep... there probably is. :)
Have fun with this discovery.
respriter is a tool that you run in PICO-8 that let you edit other p8 cartridges
With this tool you can move sprites around and have the map updated to point to the new location of your sprites, so it isn't ruined. Sprite flags are moved along with the sprite pixels.
It is useful for when you want to move sprites around in the sprite bank so related sprites are next to each other, for example.
So you can turn an unplanned and unorganized bank into a more organized one
![]()
![]()
And your map will still look like this:
Respriter will also move the sprite flags when you move the sprites.
You can write protect parts of the sprite bank if that memory is used for the map, or you can work unprotected if you really want to
![]()
![]()
It is also possible to define where your map data is stored. If it is the full 128x64, shared 128x32 or some custom rectangle anywhere in the 128x64 space
![]()
![]()
If you work often in the same cartridge you can save the cartridge, map rect and all the other settings in a workbench and load them later. When you load a workbench you load the cartridge for that workspace and also all the settings
You need to download the cartridge and run locally for it to work since it needs to load the cartridges you have stored locally
quick start
- download the respriter.p8.png cartridge
- place it in the same folder as the cartridge you want to edit
- in PICO-8, go to that folder using cd in the command line interface
- load respriter.p8.png
release history
0.3 beta (pw_respriter-5.p8.png)
- added workbenches
- added saving of state in custom map rect mode so the camera isn't reset every time it is opened
- fixed mouse cursor bug when exiting custom map rect
- fixed tutorial where right-click was used but it should read left-click
- fixed tutorial text that still referred to the app as "tilemover"
0.2.1 beta (pw_respriter-4.p8.png)
- added visualisation for where map and sprite memory overlap
- made the map memory protected from edits
0.1.2 beta (pw_respriter-2.p8.png)
- the tool now accept pw_respriter-x as filename of the tool since that is what it is called when downloaded from the Lexaloffle BBS. This should fix the issue where a downloaded cart would report an error when opening the "load cart" screen.
0.1 beta (pw_respriter-0.p8.png)
- initial release

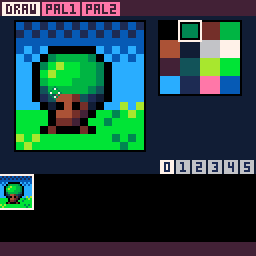
New version
I made a new version of Painto-8 that is easier to use and can change the palette during gameplay. I'm keeping the old version here in case someone still likes to use this one.
New cart: https://www.lexaloffle.com/bbs/?pid=82916
Legacy cart
--Version 02--
-
Right-click on any color on the palette to open a menu with the 2 palettes. Swap between them with the tab on top.
-
This version has poke(0x5f2e,1), so you can run the cart just when changing palette or drawing on the map area, otherwise, press ESC to resume to drawing on pico-8's sprite editor. (SHIFT+S to save changes so you don't lose what you've drawn while running the cart. Also saves the palette).
-
Suggested use: Save a backup painto-8 blank cart, and create a new file copy for each new sprite sheet you draw. For example I saved painto-meteor-joe.p8 and painto-sonic.p8 for the sheets below.
- Remember to change cartdata("bonevolt_painto-8") for each cart, otherwise all painto-8 carts will load the same palette.
Older version

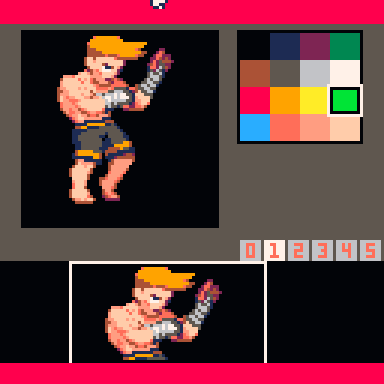
Hello everyone, today I stumbled on a undocumented feature I didn't know existed: 16 extra colors.!
I searched on the wiki and the forums and I didn't see it mentioned anywhere (except this thread, but it was a differnt thing and that feature was removed by zep at that time).
If you change the screen palette via poke (0x5f10 to 0x5f1f) to a value above 0x80, the color will change as shown below:
Here's world 2 of Jack of Spades with all colors swapped, except black and yellow:
Original colors for comparison:
You can't have more than 16 colors in a single frame though, since poking (0x5f00 to 0x5f0f) will just make the color transparent, as documented in the wiki. Still it's good for fades, and can be used for someting like stage-specific palettes like in the NES and other old consoles.
Pretty cool!

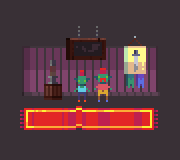
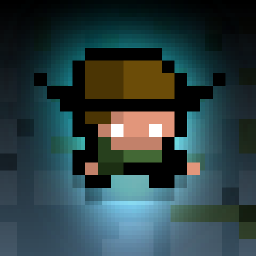
So I'm fiddling around with a quirky fantasy romper, following the wacky adventures of Stabitha and her sidekick Quiver. What do you kids think?
(that's not Stabby and Quiver, its just a random grab of orcs from my game WIP!)


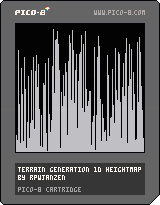
Simple terrain generation demo using a 1D "heightmap"


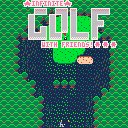
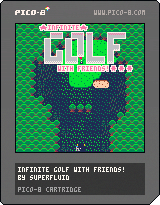
ONLINE MULTIPLAYER VERSION IS HERE!
https://gamejolt.com/games/infinitegolf/441497
Please let me know what you think :D
Updates
- Avatars! :D
- Music and sfx
- Particle fx
- Leaderboard for online play (coming very soon...)
- Scorecard every 18 holes
- Tweaks and bug fixes
- Intro screen
- Full GPIO support for multiplayer (but that needs a website to host, so watch this space...)
- Thanks @remcode @dw817 @josh999 for the awesome feedback ;)
Previous
- Autotiling
- Tweaked power meter - more power close to the max
- Randomise the golfer avatar per cart reset
- Increase par for holes with lots of water
-
Wind same for all users now
- Much improved PAN (up arrow)
-
Fixing some crazy bugs (like hole 71 causing an infinite loop <facepalm>)
- Stepping stones in lakes - hopefully this should sort the unplayable holes issue
-
Menu options to reset hole and delete save game
- Tutorial level!
- The holes start easy and get harder - after 50 or so holes anything goes
- Procedural generation basic version is ready!
- Up/Down to pan a bit
- Lots of UI tweaks
TODO
- Online replays via GPIO and a BAAS (e.g., FatFractal)
- Stats screen (every 18 holes?)

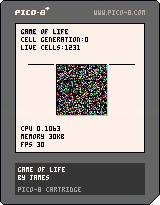
I try to make a quick version of Conway's Game of Life in whatever environment I am trying to program in when first starting out.
It gets me familiar with loops, arrays and some general logic and looks kind of nice in the end.
There are lots of versions of this online already, but I hope you find this one somewhat colourful and pleasant.
(my name is James, hence the semi-pun)

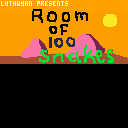
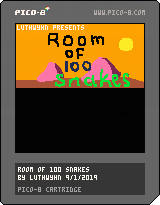
Room of 100 Snakes is my re/demake of ArcaneKids' classic game Room of 1000 Snakes, originally released as a 3D game using Unity.
Unlock the mystery of snakes!

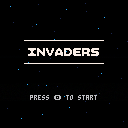
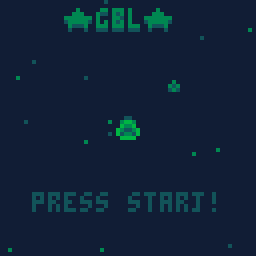
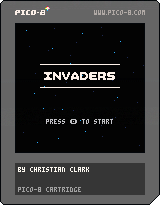
Here is what I have so far. I finished the basic game mechanics a few weeks ago and now I'm starting to expand beyond a normal space invaders clone. I just finished adding the particle effects and screen shake effect. I've never done anything like this before so this game is full of firsts for me. I'm planning to refactor the code and make it more organized before I add more features. I'm sure that you all have some advice for ways to improve the code and make it more efficient. I'm open to any suggestions you may have. After I'm done reorganizing the program I have several decisions to make. I'm trying to decide if I should add a health mechanic for the basic aliens or reserve it for bosses only.
Completed:
. collisions
. bullets
. square formation enemies(like space invaders)
. particle effects
. basic sounds
. basic title screen
. screen shake effect
. sprites and visual stuff
TODO:
. sprite animations
. better menu
. weapon upgrades / multiple types
. powerups/health drops
. multiple enemy types
. waypoint/parametric equation based enemy movement(like Galaga)
. score system and level progression
. a boss battle
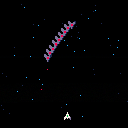
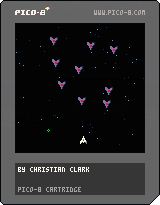
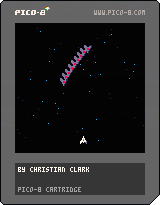
below is the beginnings of my new enemy movement system that will make use of parametric equations as well as lerp and waypoints probably to make transitions smoother. In the carts below, the enemies are moving along a Lissajous curves. I think it looks pretty good for a swarm of aliens.
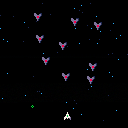
second lissajous movement variation: